
Conchas
Fermented Sweet Dough
Concha, meaning “seashell” in Spanish, gets its name from the sugar cookie-like, unleavened disc that is prematurely stamped into the bizcocho dough before proofing. As the dough rises, the topping expands and cracks, resembling a seashell. The buttery, brioche-like pastry is perfectly complemented by the sugar topping, although the reasoning behind the topping application remains a mystery. However, there is a striking resemblance to the method used in melonpan, which is a Japanese rock melon-shaped bread.
There are some best practices to consider when making these iconic pastries at home. Spacing is critical to the texture of the finished product. Placing too many dough pieces on a baking sheet can cause the conchas near the edges to dry out, while those in the center need a longer baking time. A two-inch (5-centimeter) distance between each 55-gram (2-ounce) dough piece is ideal for an even and consistent bake.
Besides the texture, the sugar topping is also critical to the typical concha enthusiast. When making the sugar topping, you can switch out the granulated sugar for powdered or confectioners’ sugar, using a one-to-one conversion. The powdered sugar creates a more cookie-like experience and makes the pastry easier to handle when packaging. Granulated sugar tends to smear and melt during packaging and transport, so it’s important to consider this when thinking about your presentation.
To make the sugar topping, begin by rolling the topping mixture into a log. Pinch off a 20-gram (0.75-ounce) piece and flatten it with the flour-dusted palm of your hand before placing it over the greased bizcocho dough ball. Next, flatten the sugar topping disc onto the dough piece before creating the concha pattern. This can be done by using a concha stamp. If you don’t have a stamp, the dull side of a knife or the curve of a circular cookie cutter can be used to carefully score the design.
At this point, the oven can be used as a proofing chamber, but make sure it’s turned off. Using the oven for proofing requires keeping a close eye on the rising process of the dough, since you will need to eventually preheat your oven. While the oven is preheating, the rising dough can be placed on your kitchen counter to complete its final proof.
During proofing and baking, the concha pattern serves as your guide. As the dough rises, the seashell pattern will take shape. Once the sugar topping starts to separate at the “cuts” in the design, the conchas are ready to be placed in the oven. The pattern will later brown during baking, indicating that the conchas are done baking.
Ingredients
Bizcocho Dough
Yield: 20, 55-gram servings
Each ingredient is provided in terms of metric, imperial, and baker’s percentage (%).
500 grams (3 1/2 cups) unbleached all-purpose flour (100%)
240 milliliters (1 cup) water (48%)*
120 grams (1/2 cup) sugar (24%)
115 grams (1/2 cup or 1 stick) unsalted & cubed butter (23%)
100 grams (2 large) eggs, without shell (20%)
14 grams (4 teaspoons or 2 packets) fast-acting instant yeast (2.8%)
8 grams (1 teaspoon) table salt (1.6%)
5 milliliters (1 teaspoon) vanilla extract (1.0%)
2 grams (1 teaspoon) coarse-ground cinnamon
*The water temperature should be around 75°F (24°C).
Total dough weight: 1,104 grams
Concha Sugar Topping
The sugar topping can be prepared 2 to 3 days in advance and stored in an airtight container at room temperature.
215 grams (1 1/2 cups) unbleached all-purpose flour (100%)
150 grams (3/4 cup) granulated sugar (69.7%)
143 grams (3/4 cup) vegetable shortening (66.5%)
Total topping weight: 508 grams
Chocolate Sugar Topping
• 250 grams Concha Sugar Topping
• 1 tablespoon (6 grams) unsweetened cocoa powder
Mix by hand to form a chocolate sugar topping.
Colored Sugar Topping
• 250 grams Concha Sugar Topping
• 1-2 drops of food coloring
Mix by hand to form a colored sugar topping.
Special Tools & Equipment
Stand mixer with paddle (flat beater) and dough hook attachments*
Digital scale
Digital dough thermometer
Plastic dough scraper
Concha stamp, dull knife, or circular cookie cutter
*A 5.5-quart or larger stand mixer is recommended for this recipe.
Dough Mixing Procedure
Using a large 2-quart bowl, pour the dry yeast over the flour and mix thoroughly by hand using a whisk. Set the bowl aside.
Add the water, eggs, sugar, and vanilla to a stand mixer bowl and combine by hand using a whisk.
Attach the paddle attachment to the mixer.
On low speed, gradually add the flour and yeast mixture to make a very soft dough. Mix for 1 minute on the stir setting.
Add the salt and cinnamon and continue to mix for 30 seconds on 4th speed.
Stop the mixer and remove the paddle attachment. Scrape the sides of the bowl using a plastic dough scraper, then attach the dough hook.
With the dough hook, knead on 2nd speed until the dough has fully come together, but is still quite soft.
Add the butter, one piece at a time, while continuing to mix on 2nd speed. The dough will become very slack. Continue to knead until it firms up.
After kneading for 4 minutes, stop the mixer and lower the mixing bowl.
Using the plastic scraper, scrape down the sides of the mixer.
Continue to knead for an additional 25 to 30 minutes on 4th speed to achieve full dough development, scraping the bowl in 10-minute increments. For this recipe, you need to knead.
Use a thermometer to check the dough temperature. It should read between 85˚F to 95˚F (29.4˚C to 35˚C).
Remove the dough from the mixer using a plastic dough scraper and place it onto a flour-dusted countertop.
Shape and round the dough using a tuck-and-pull method. Place the dough in a buttered or greased bowl. Cover the bowl tightly with plastic wrap and set aside for 60 minutes. Note: The dough can be refrigerated to undergo overnight fermentation (8-12 hours), not to exceed 18 hours.
When removing the dough from the refrigerator, let it rest until it reaches an internal temperature of 55°F (13°C) before dividing and processing.
Concha Sugar Topping Procedure
Start by adding the shortening and sugar to the stand mixer bowl.
Using the paddle attachment, mix on 6th speed until creamy, about 1 minute.
Stop the mixer and scrape the sides using the plastic scraper.
Turn the mixer to 2nd speed and gradually add in the flour until it’s incorporated, about 1 minute.
Increase the mixer speed to 4th speed, and beat until the dough clumps into a paste, about 2-4 minutes. The sugar topping should stick to the sides of the bowl and need flour to easily handle.
Set the topping aside or measure it out into 250-gram portions to create your chocolate and colored sugar topping variations.

Chocolate Sugar Topping

Colored Sugar Topping
Concha Procedure
📷 - See the corresponding photo for the step below.
Lightly grease a baking sheet (13” x 9.5”) with vegetable shortening.
Mix the bizcocho dough (following the recipe at the beginning of the chapter).
Allow the bizcocho dough to ferment before dividing it into 55-gram dough pieces.
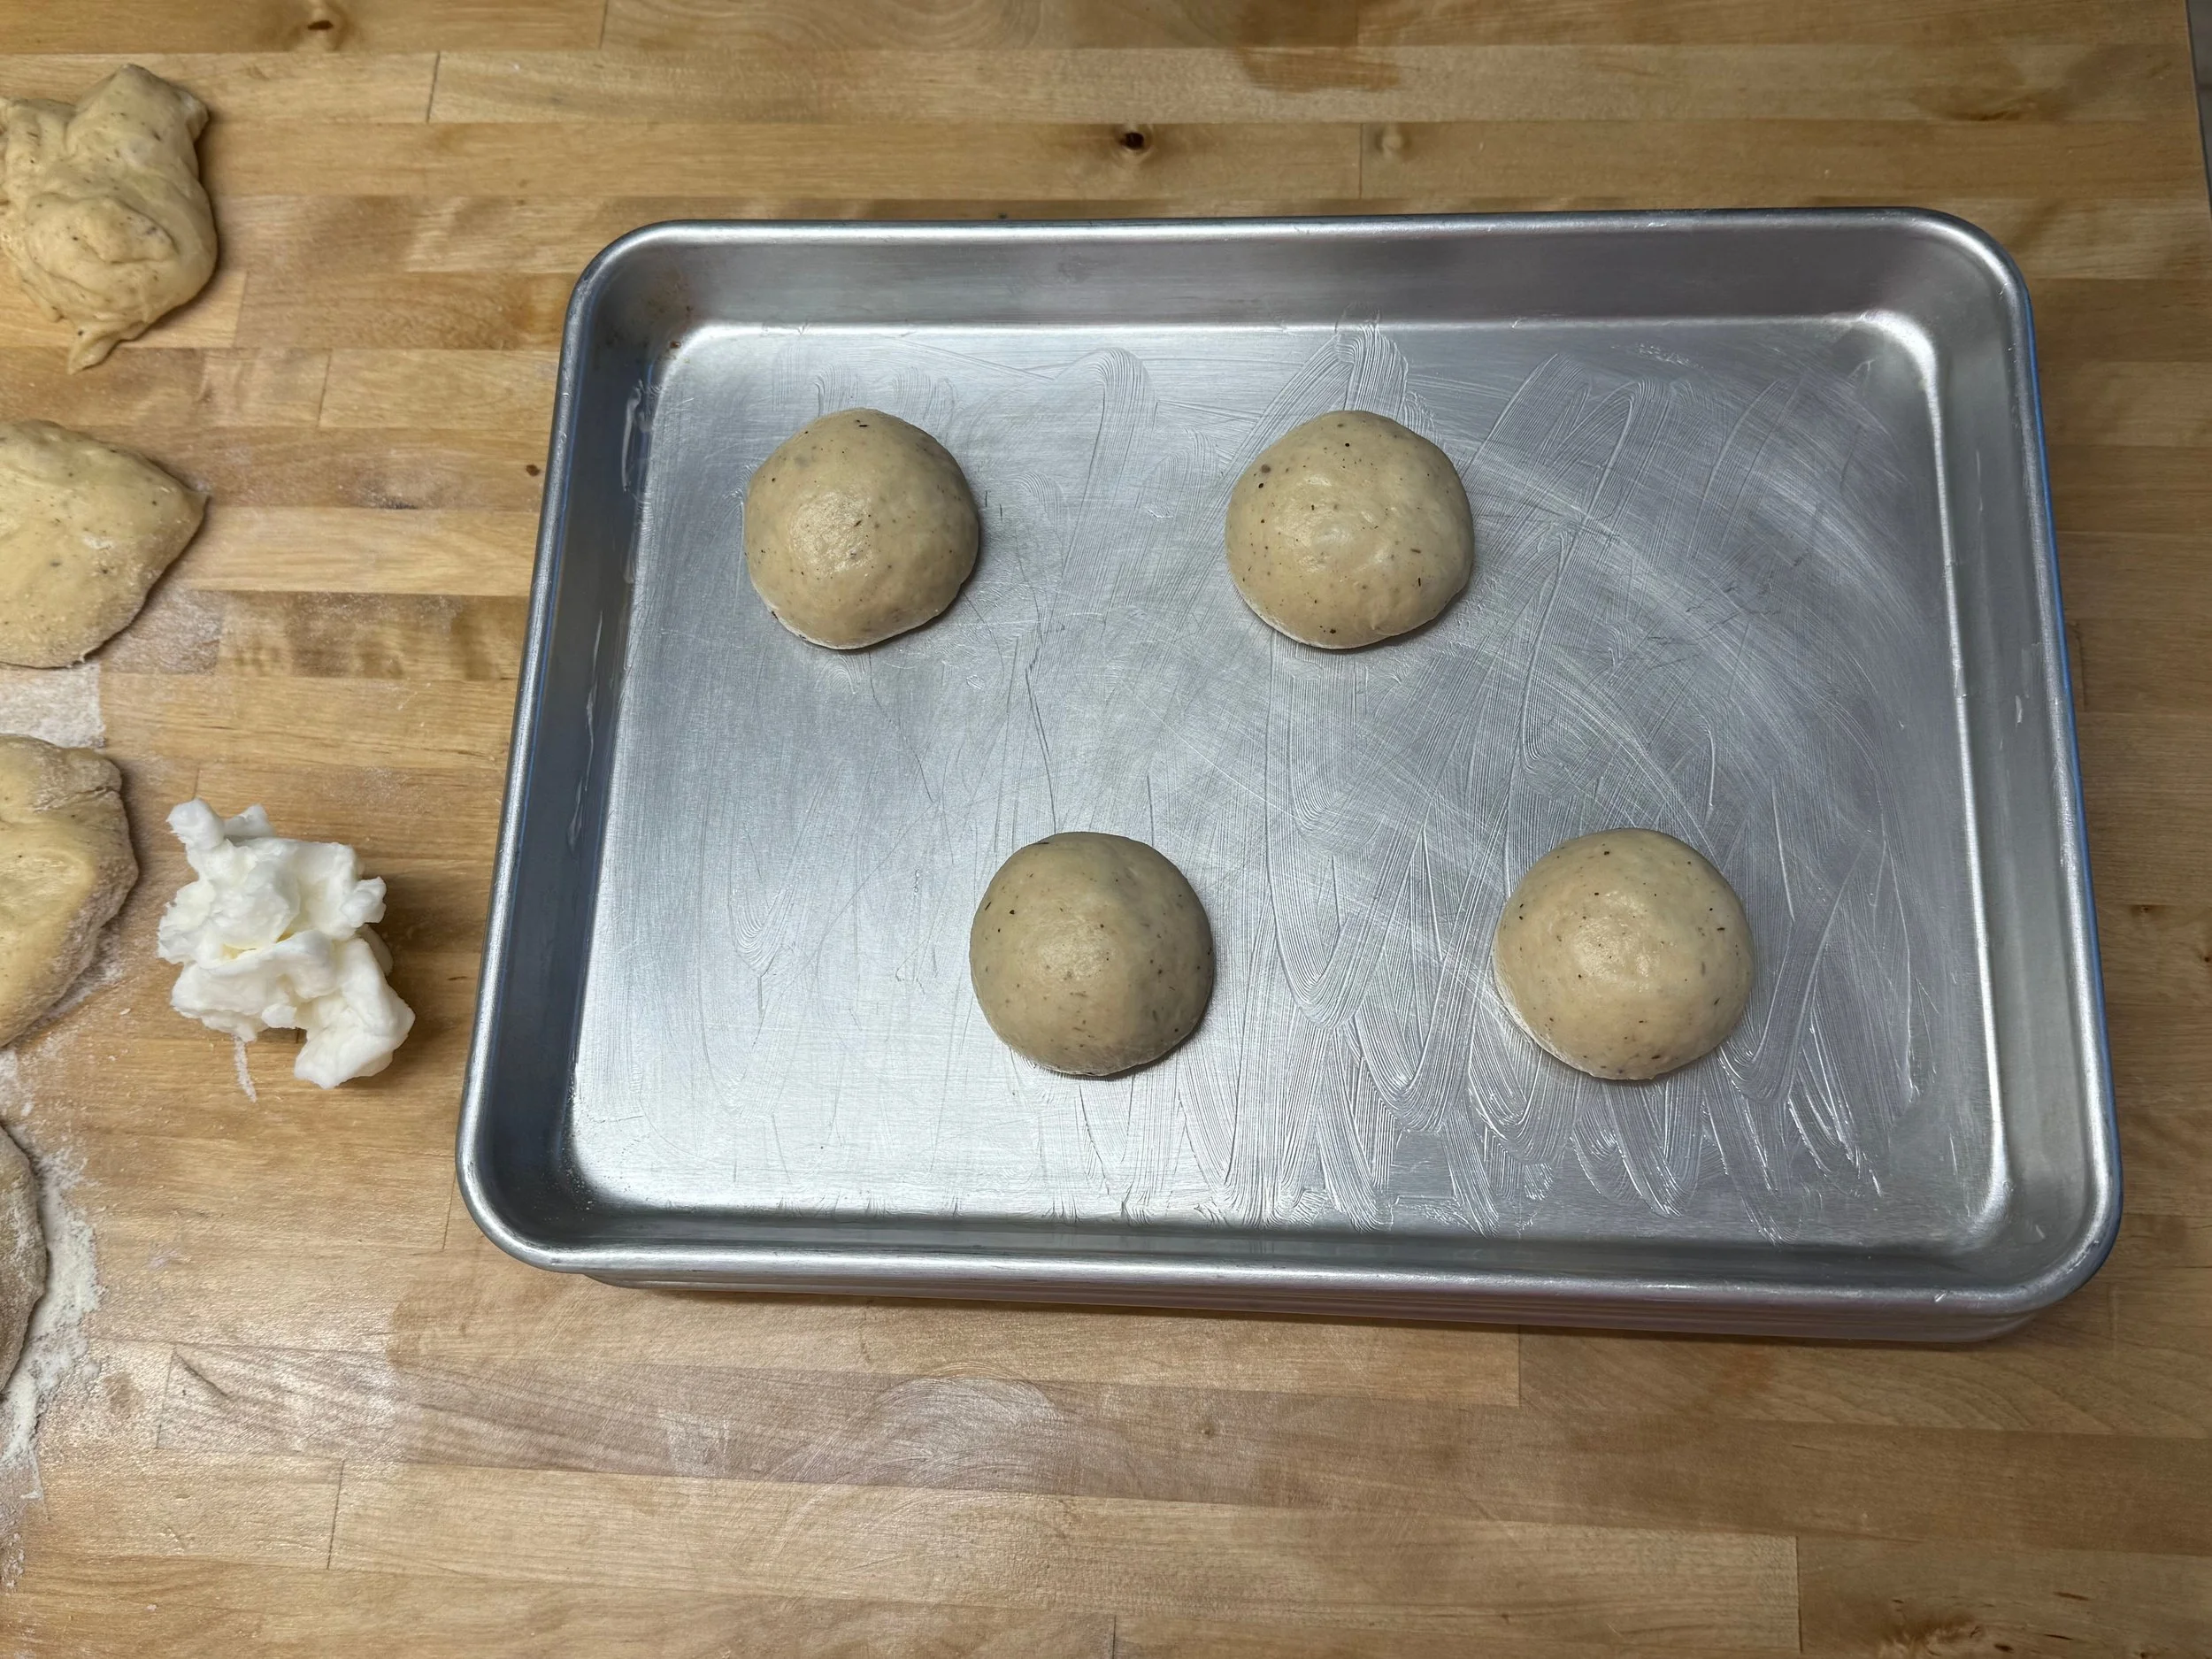
Round the dough pieces and place them on the greased baking sheet (about 4 per sheet tray). Leave 2 inches of space between each dough ball. 📷
Coat each dough piece with a thin layer of vegetable shortening.
Allow the dough balls to rest for 15–20 minutes (intermediate fermentation) before applying the sugar topping.
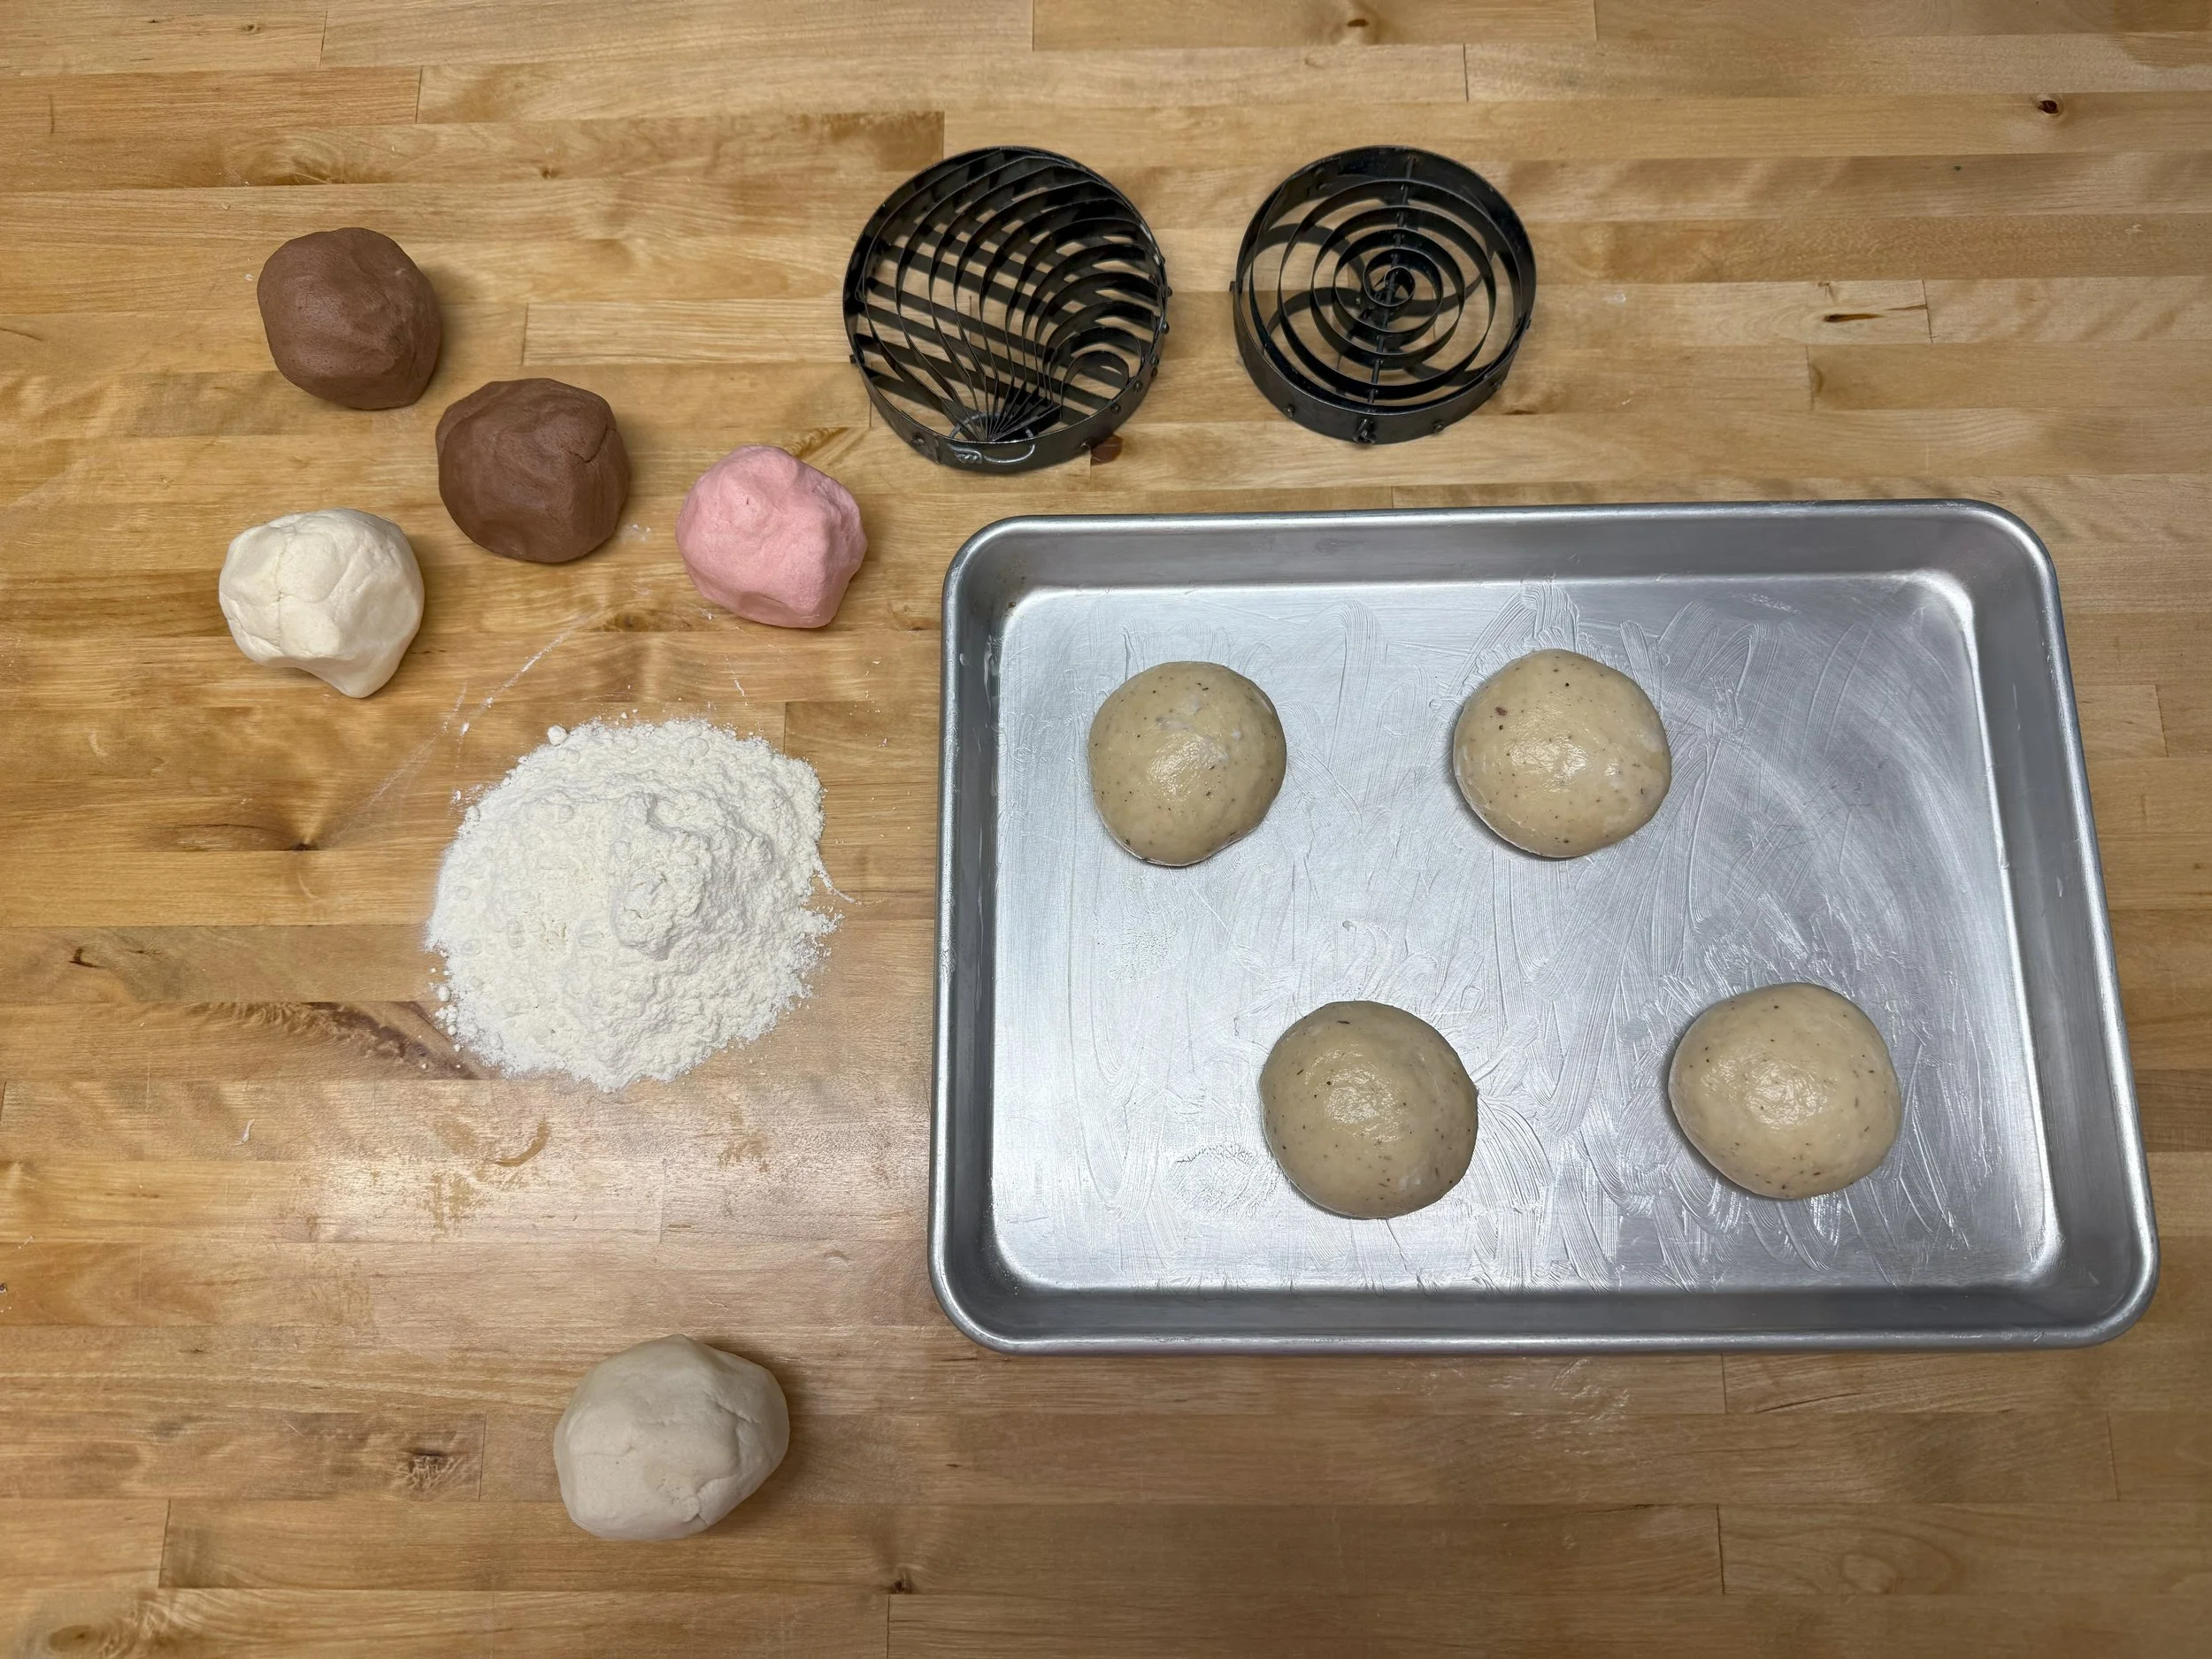
Prepare the sugar topping by dividing the topping (including your variations) into 4, 80-gram pieces.
Dust the counter and your hands with flour.
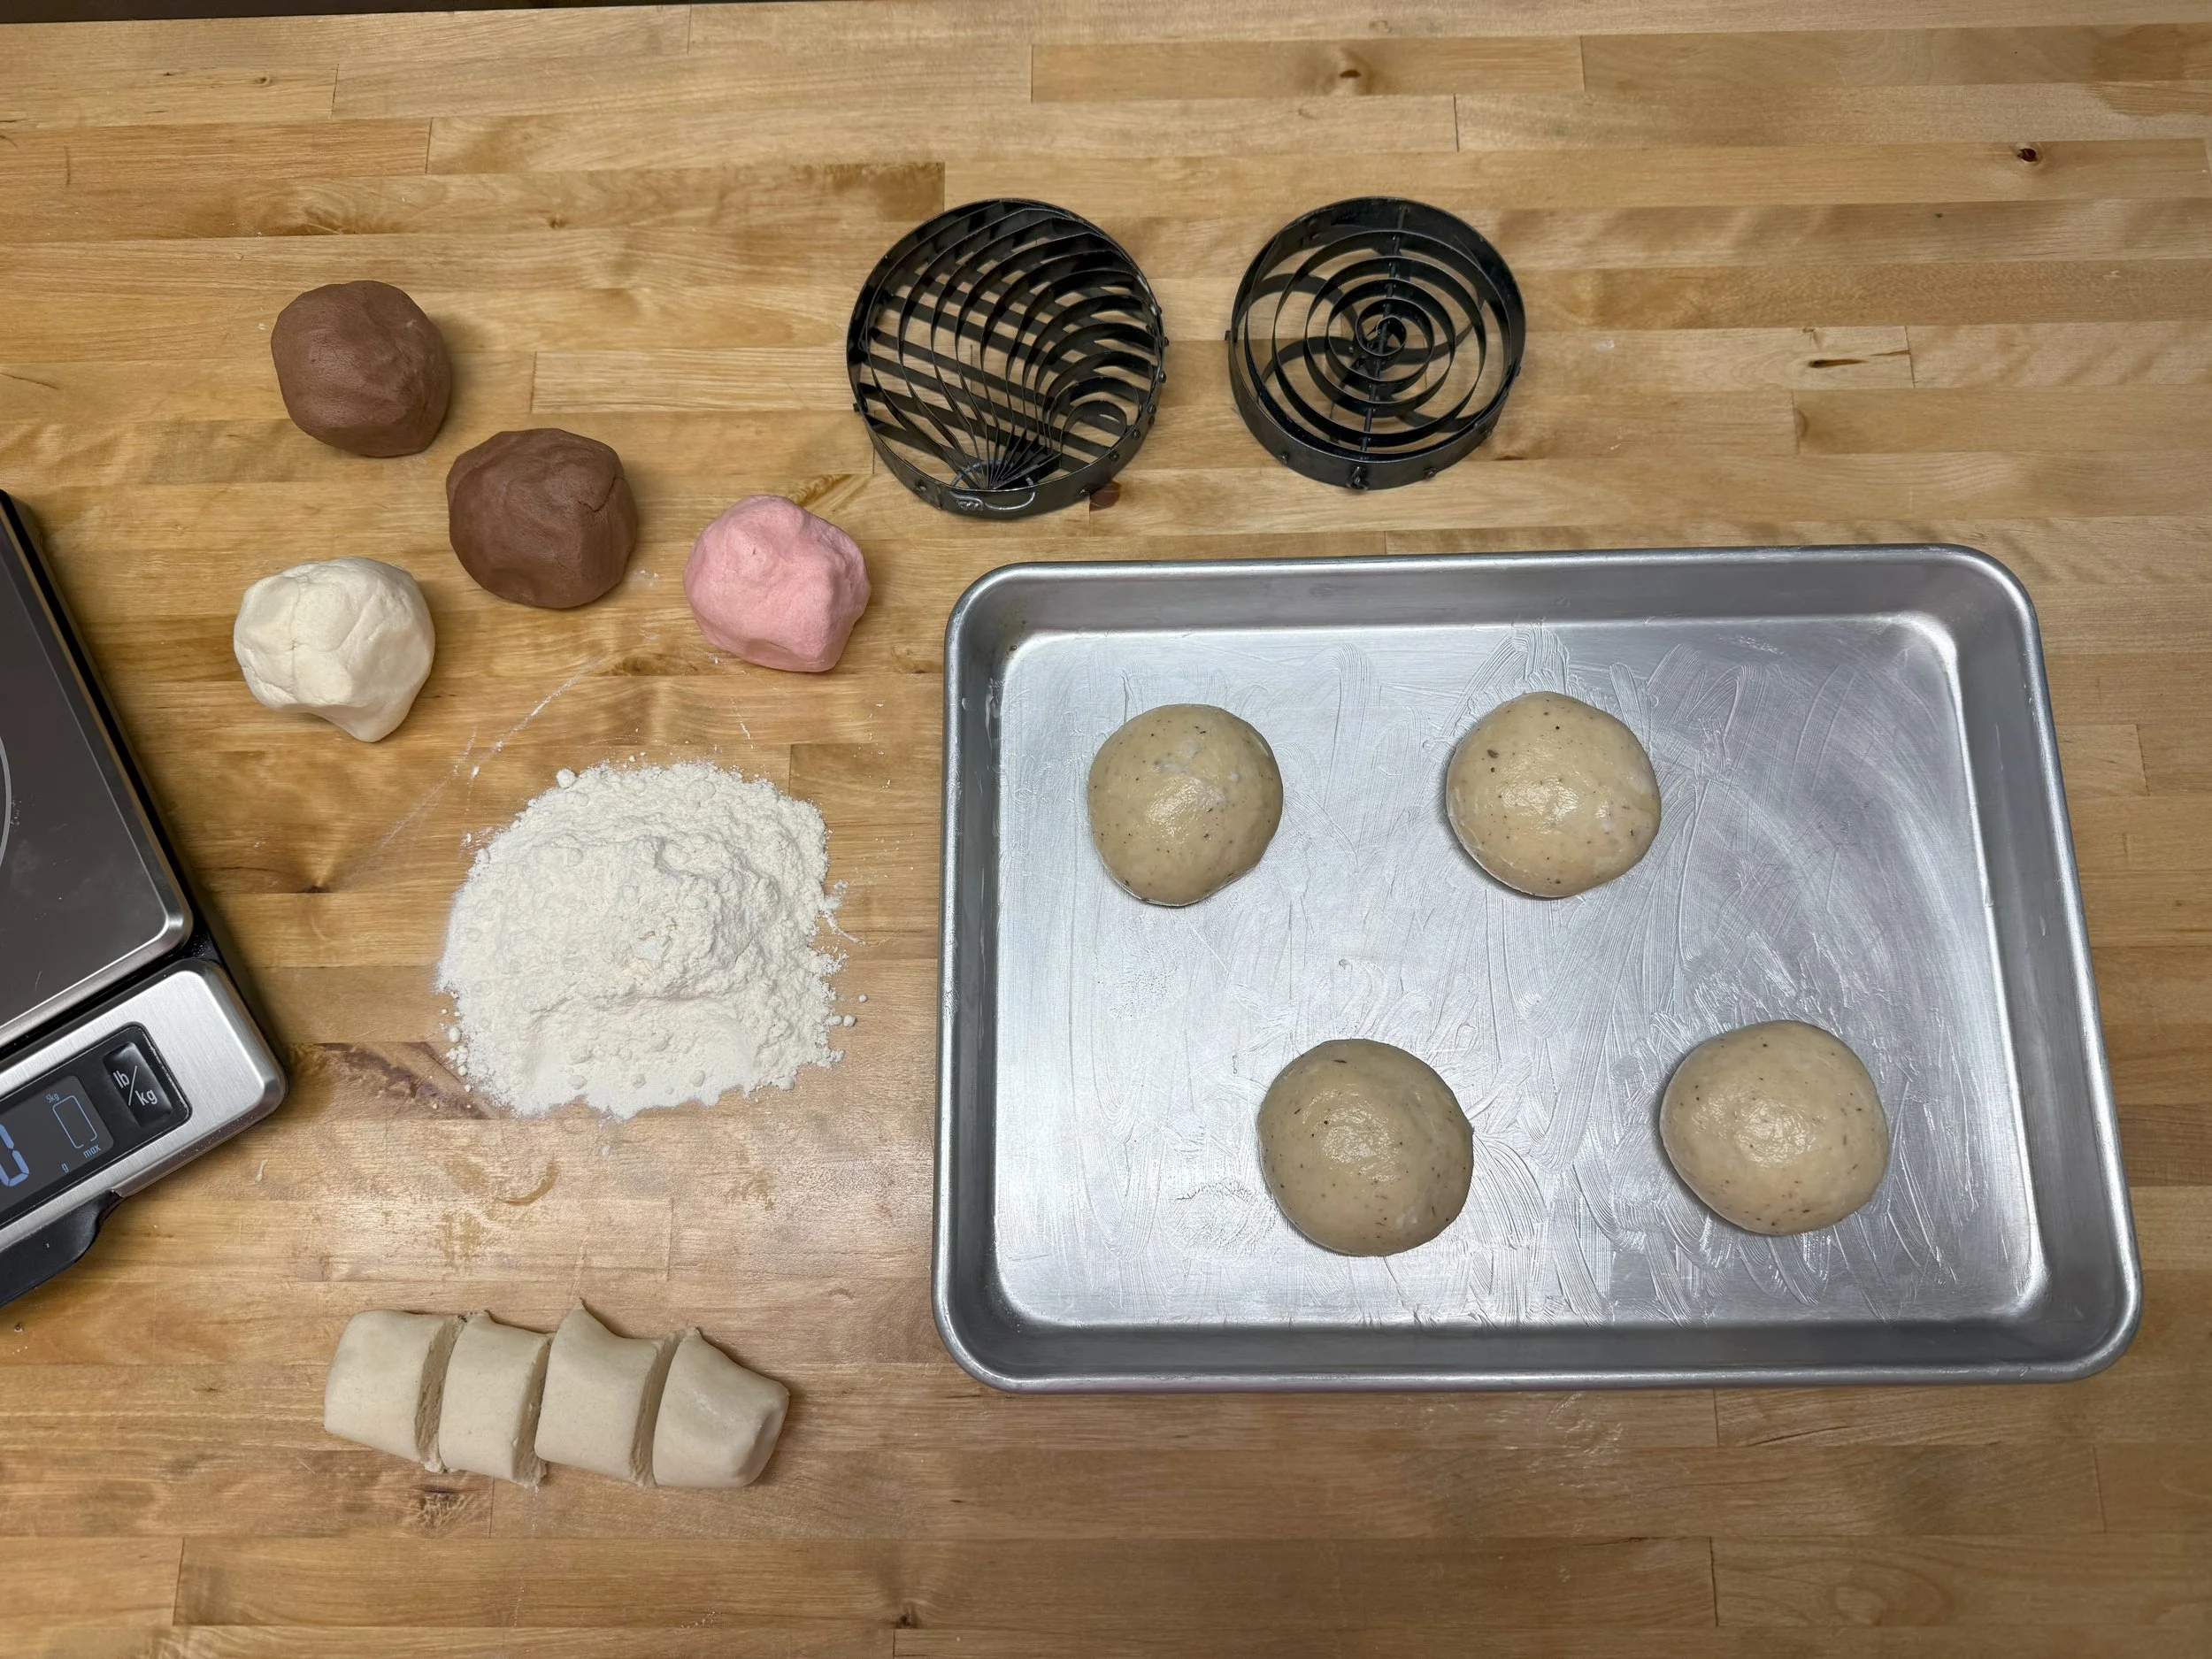
Take one of the 80-gram sugar topping pieces and gently roll it into a log with about a 1 ½ inch diameter. (This same process applies to the Chocolate and Colored Sugar Topping.) 📷
Using the plastic dough scraper, divide the log into 1 ½ tablespoons (20-gram pieces) or 4 pieces total. 📷
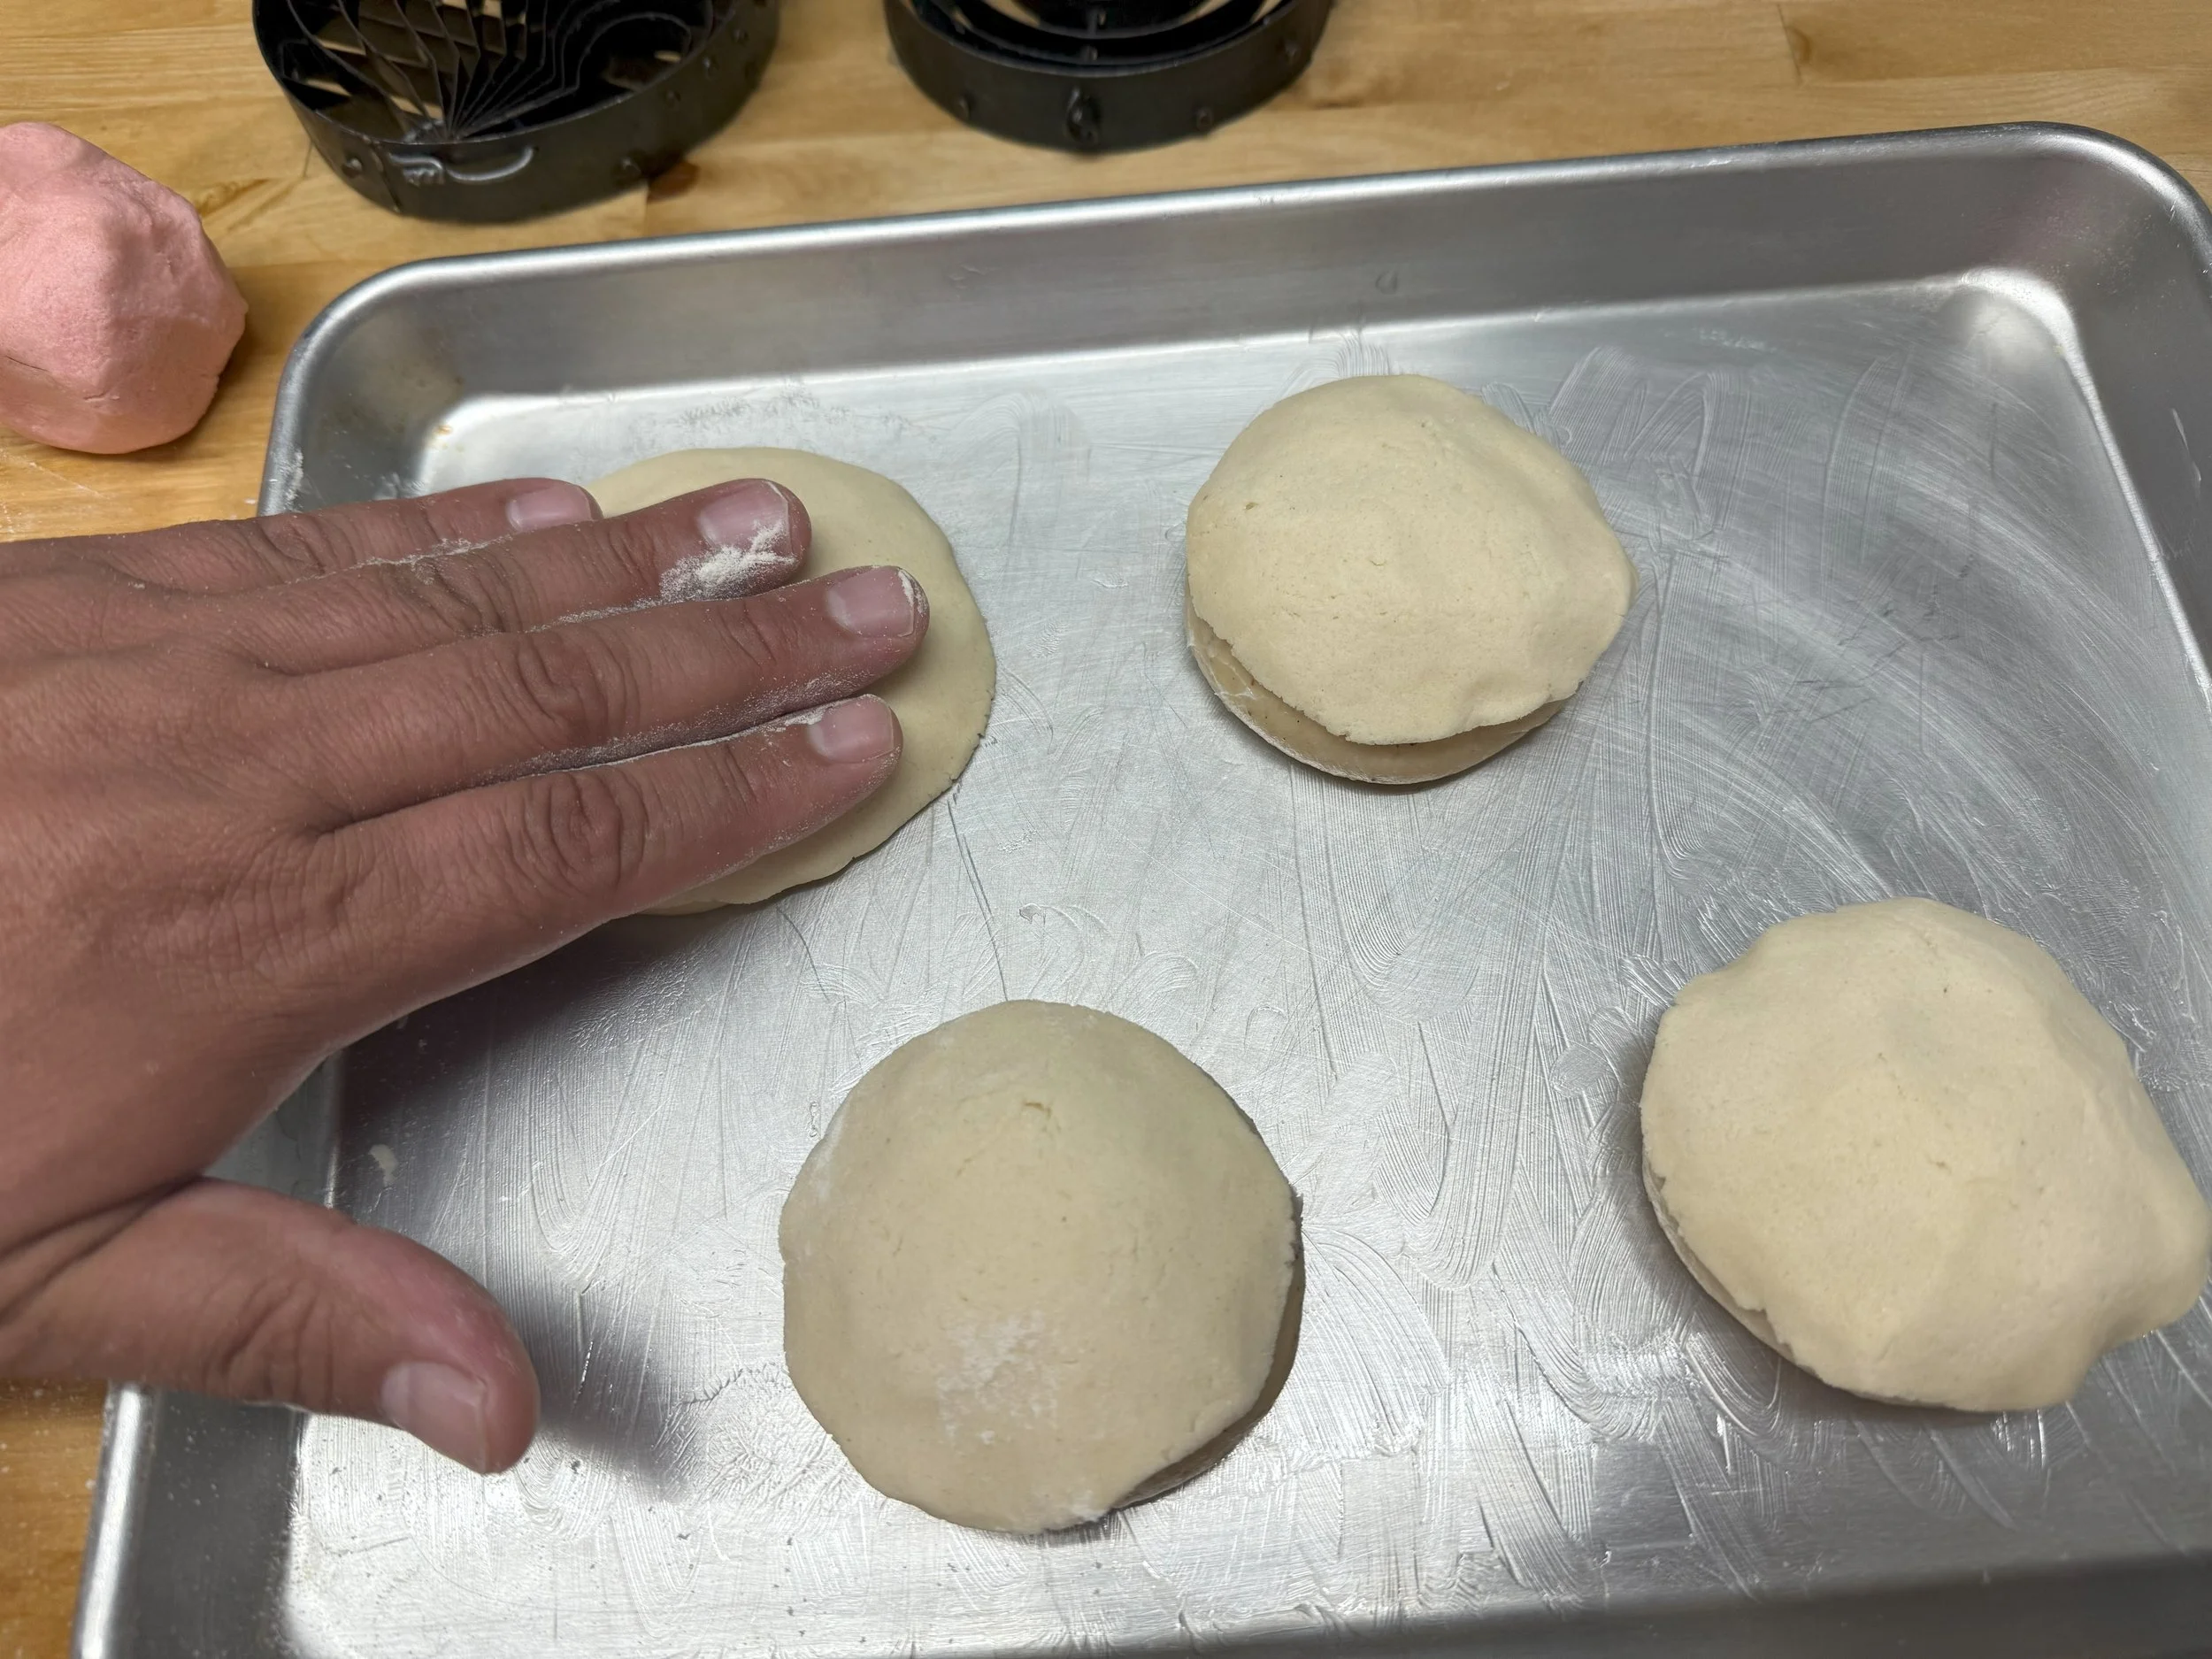
Flouring your hands again, one at a time, round each portion, then pat the topping between your palms to make a thin disc (similar to patting out a tortilla). Make sure to use flour to prevent sticking. 📷
Place the disc carefully over each bizcocho dough ball, pressing gently so the disc sticks. 📷
Carefully spread the disc so the entire dough piece is covered with the sugar topping.
Lightly dust the covered dough pieces with flour and flatten them using the palms of your hands.
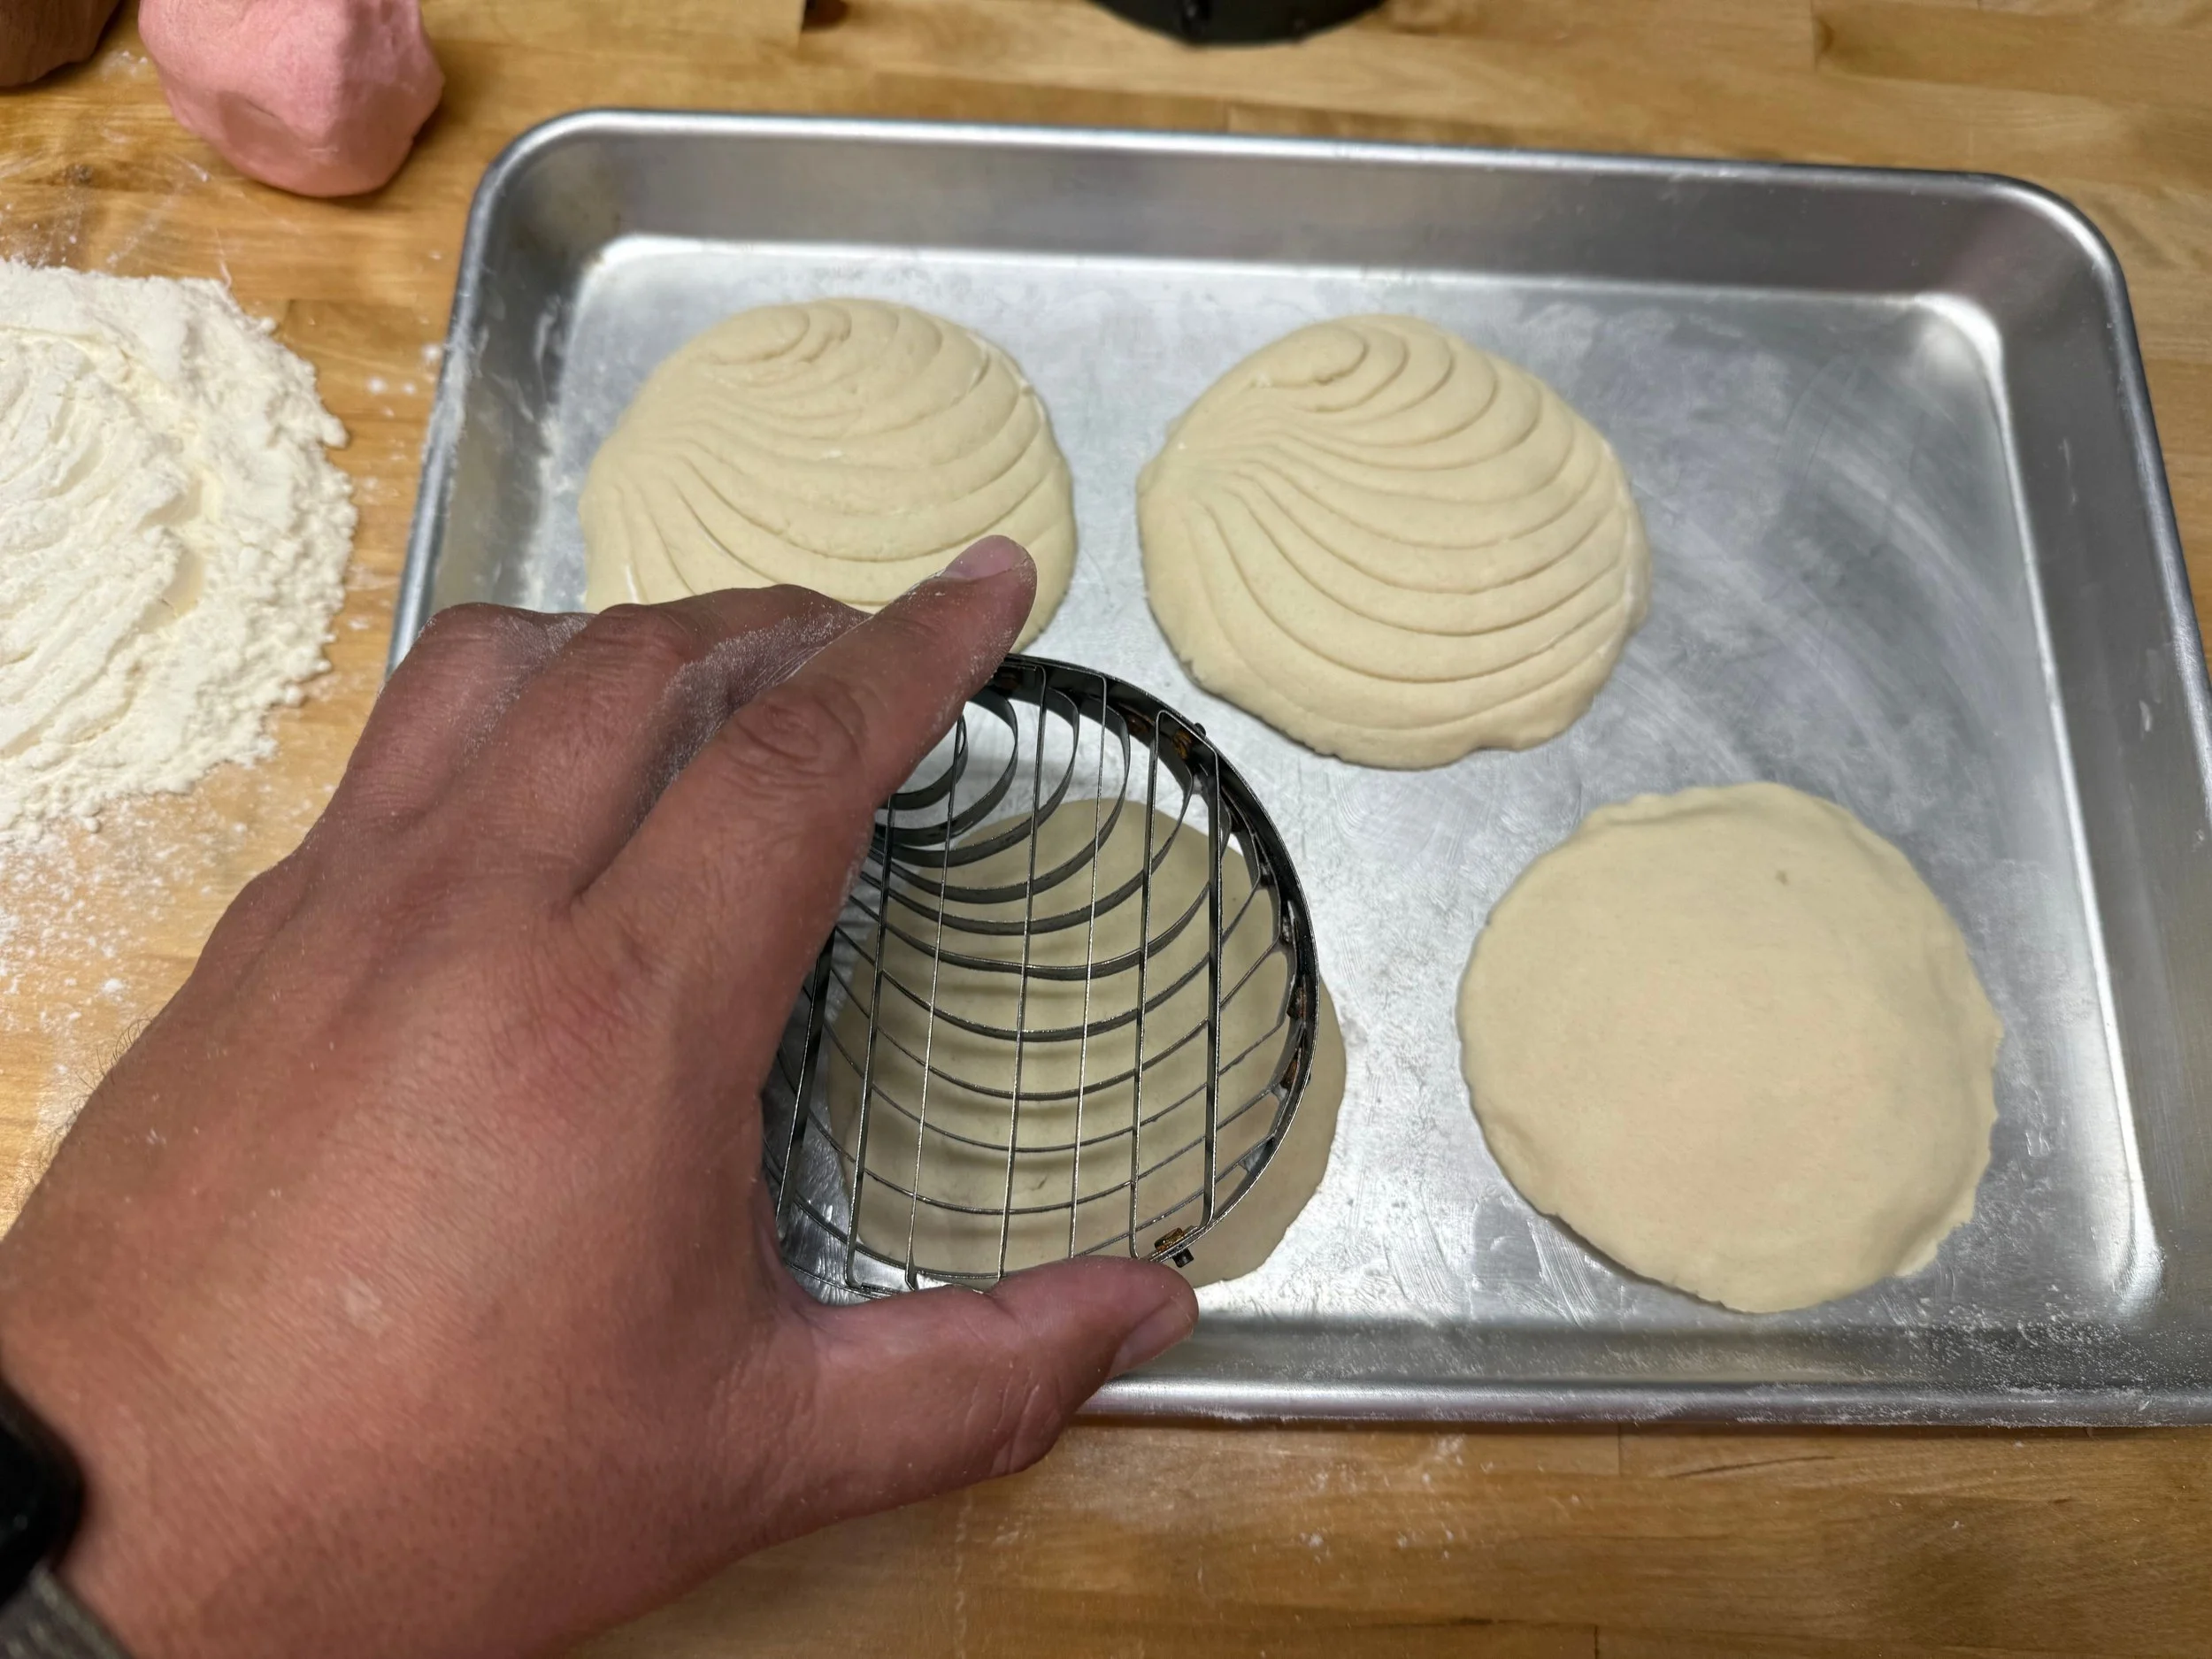
Using a concha stamp, create the concha design by pressing it lightly into the topping, being careful not to slice into the dough. Alternatively, you can create the design by using the dull side of a knife or a circular cookie cutter. If you use a cookie cutter, you can use its rounded edge to easily create the curves. 📷
Once the conchas are stamped, position the baking racks in the top third and center sections of the oven and preheat the oven to 350°F (177°C).
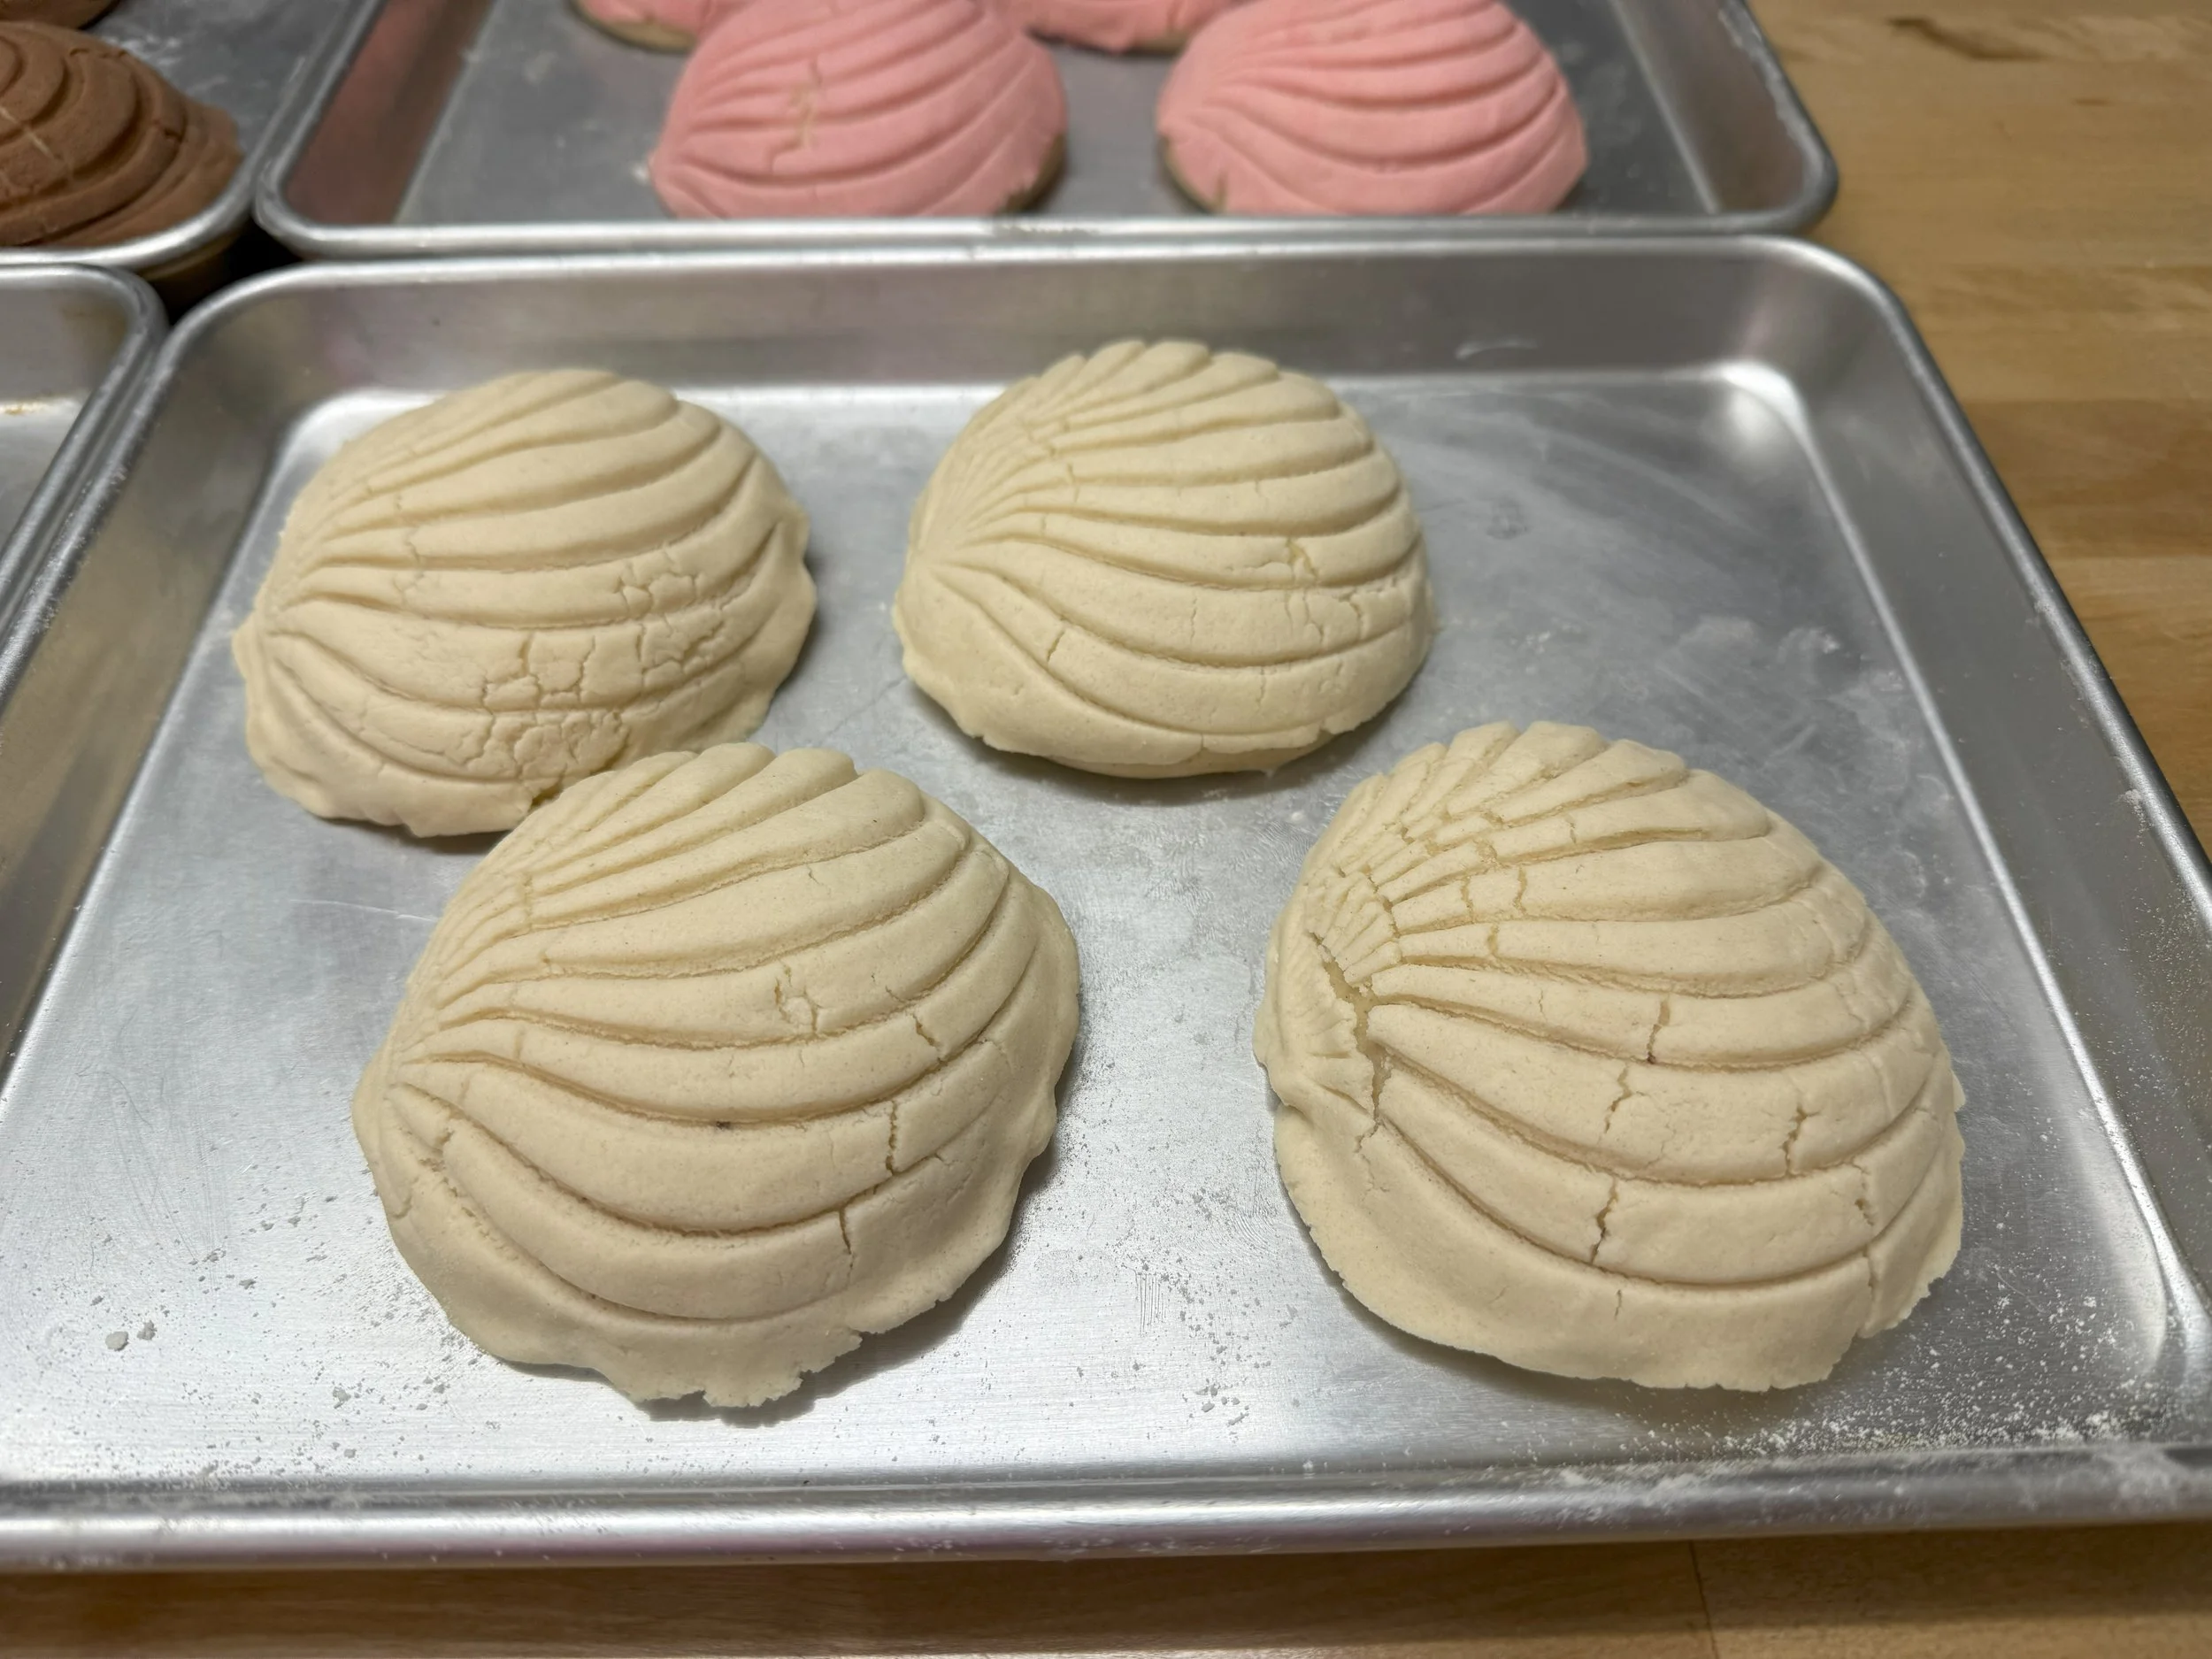
While the oven preheats, let the conchas rest in a warm place (around 75°F / 24°C) for 30 to 60 minutes until they look puffed or nearly doubled in size. Note: Do not exceed 90 minutes. At this stage, the topping will begin to separate between the cuts. The separation of the topping is an indicator that the conchas are ready to be baked. 📷
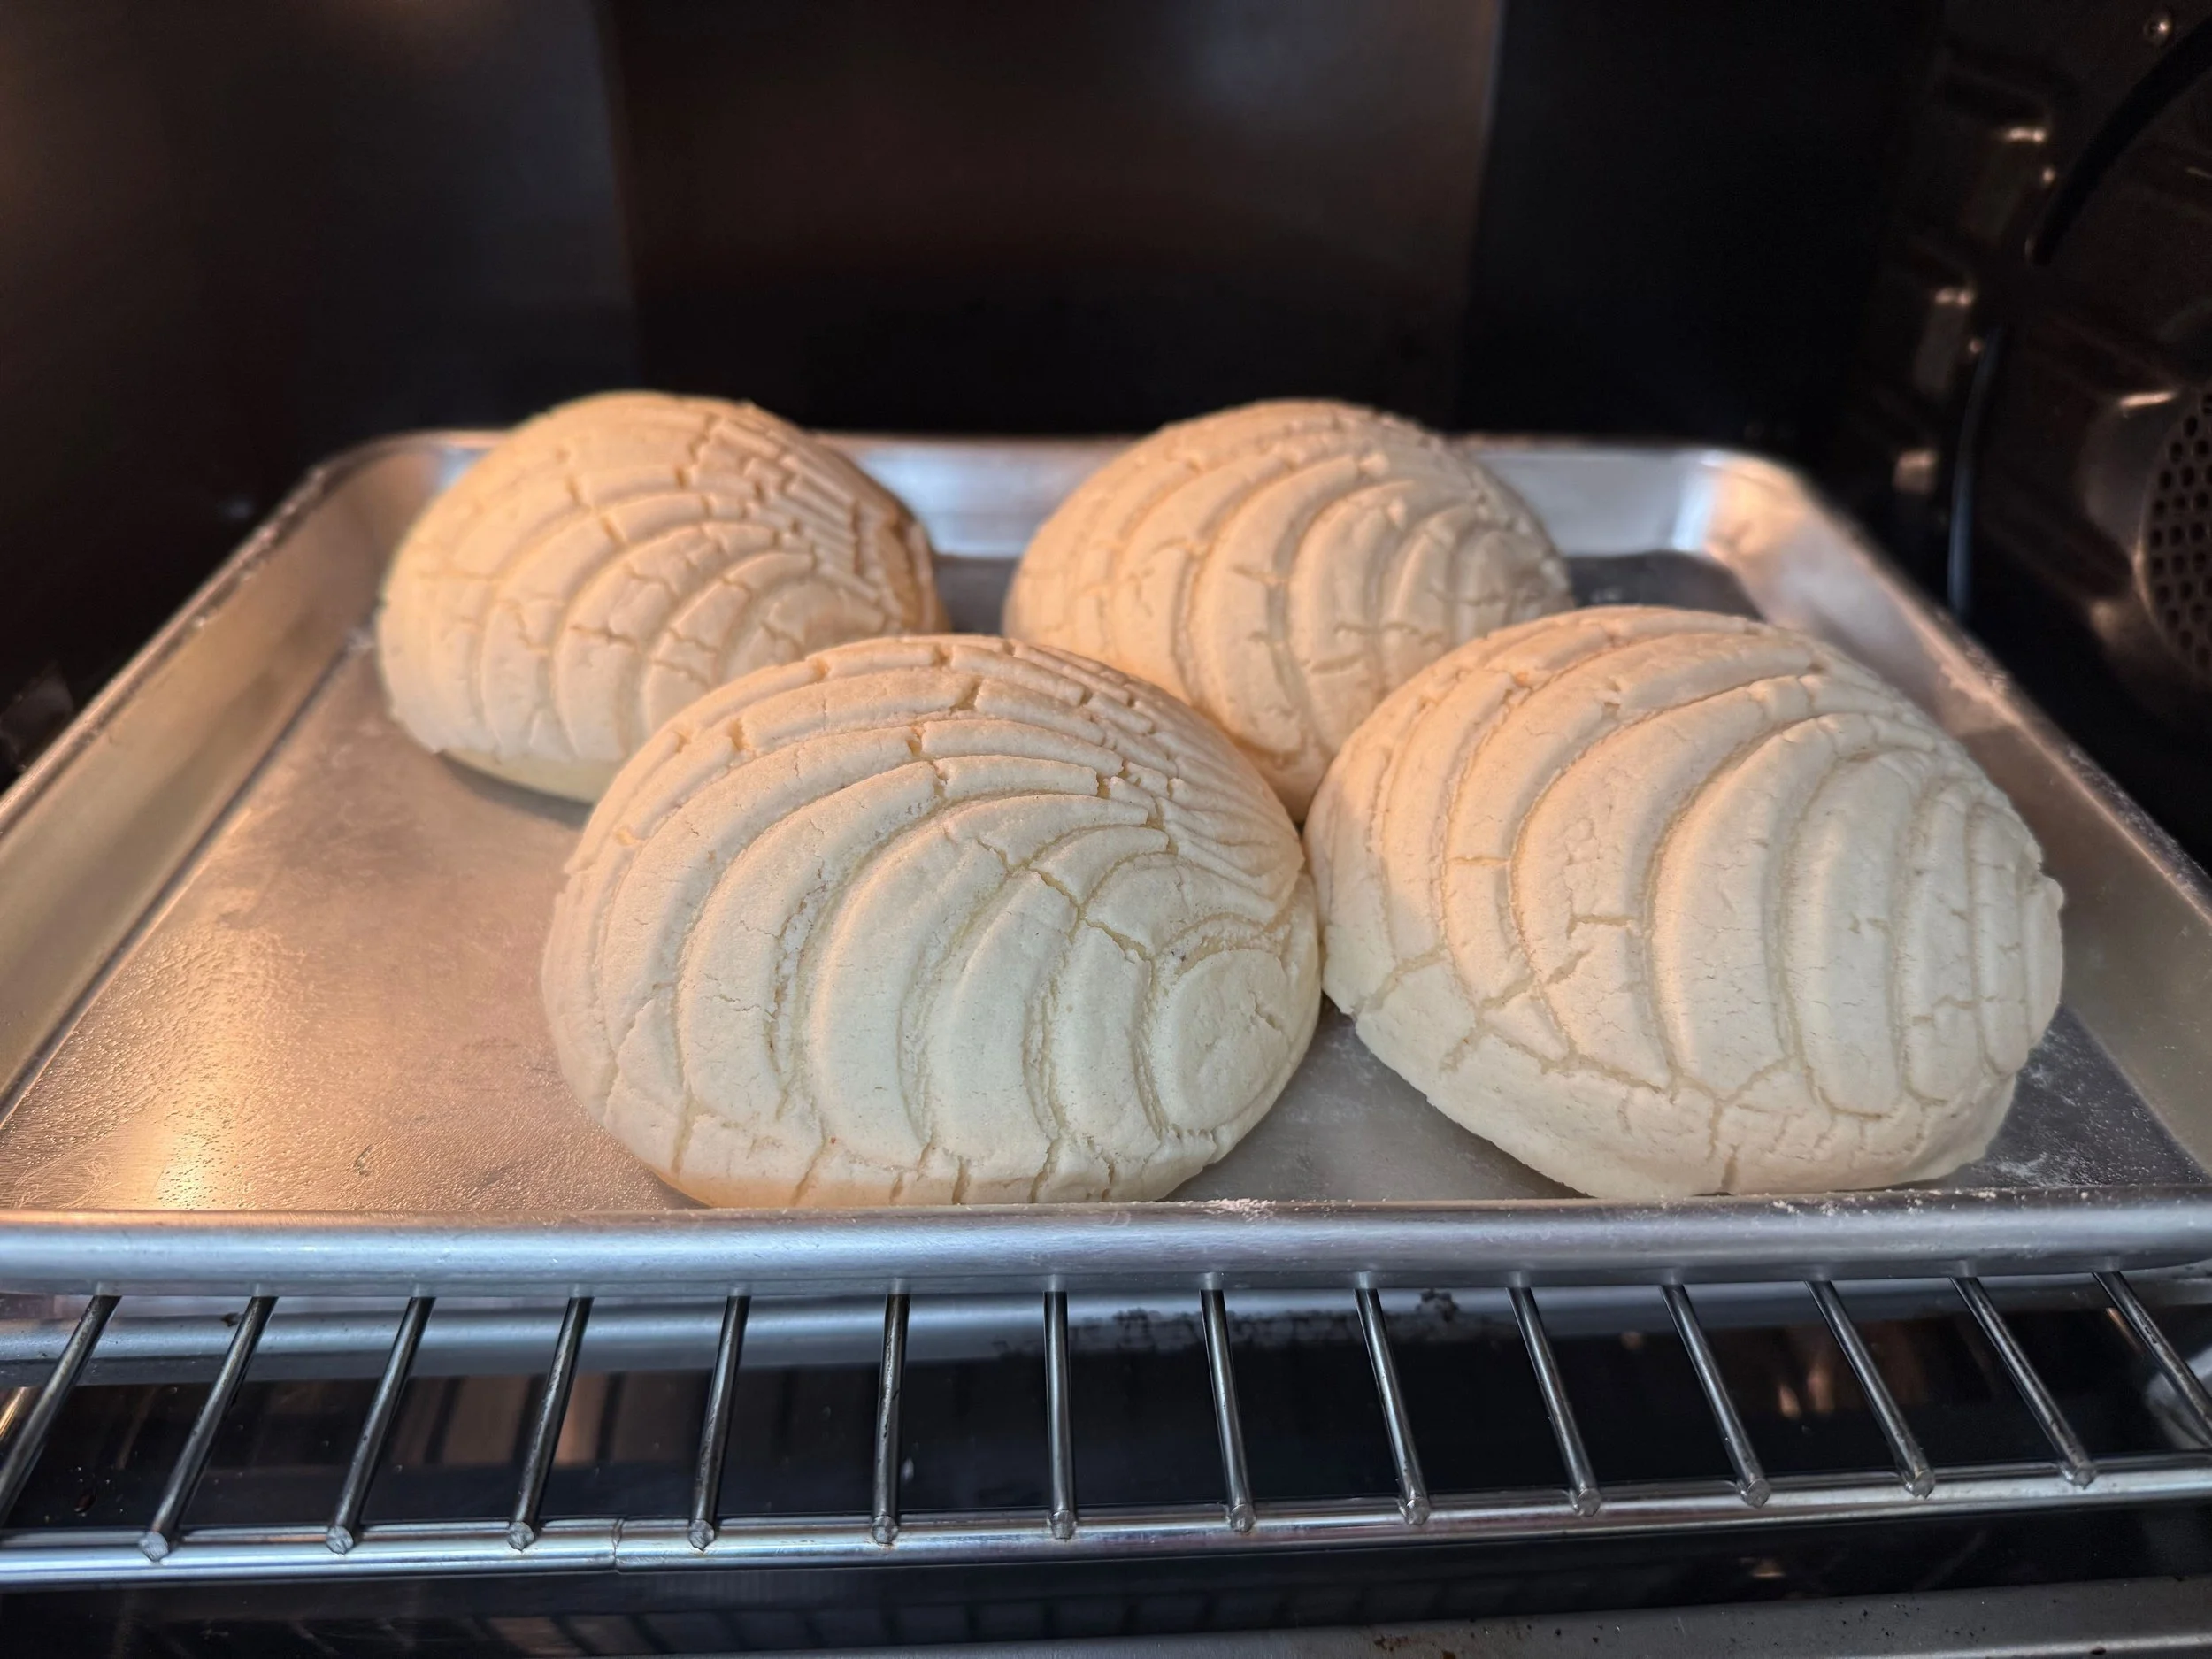
Bake the conchas for 20-25 minutes without the convection setting (fan off). 📷
Concha Photo Guide
Step 4
Step 9
Step 10
Step 11
Step 12
Step 15
Step 17
Step 18

Chef Alex Peña
Author